Awesome Water Experiments That Anyone Can Do At Home
Hello friends, today we are going to do three amazing experiments with water. These experiments are very easy and amazing anyone can do them at home.
Let’s start.

Let’s start.
1 Simple Lava Lamp:

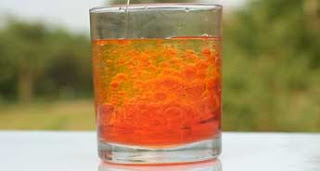
The lava lamp is a very interesting experiment. Kids love this experiment. In this experiment, many colored bubbles move inside the glass which looks so awesome.
Materials required :
- A clear glass
- Vegetable oil
- Food coloring.
- Fizzi tablets like Eno.
- Water
Process :
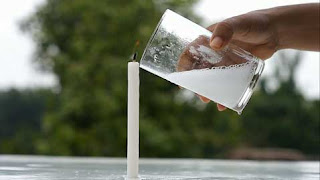
The process is very simple. Put the glass on the table and pour 100 ml water. Pour two or three drops of food coloring into the water and mix with a spoon. Now pour the vegetable oil. Take a fizzy tablet like Eno and pour it into the water. Bubbles will start coming up and down.
Science Behind it :
We know that oil and water do not mix. Oil is less dense than water, and thus, floats on top. The Fizzy tablets release Carbon dioxide gas when mixed with water. Carbon dioxide is lighter than both water and oil. The Carbon dioxide tries to escape in the form of bubbles. As they reach the surface, they pop, releasing Carbon dioxide into the atmosphere. The water with which bubbles were formed sinks back through the water layer. This way we get the lava lamp effect.
2 Arrow Changing Experiment

Arrow changing experiment is another very interesting experiment.
This experiment is based on light. It looks like magic. When we pour water into the glass the arrow change in the opposite. Actually, this illusion takes place due to refraction. We will study the science behind it but let’s start the experiment.
Materials required :
- A clear glass
- A paper
- Marker
- Water
Process :
The process of this experiment is very simple. Take a piece of paper and draw two arrows. Choose a place where you can stick this paper and can do the rest of the work in front of it like near a wall. Stick the paper on the wall and put the glass in front of those two arrows. Be sure the arrows should be in the middle of the glass. The setup is now ready. Take a water bottle and pour water slowly and observe the changing of the shape of arrows from the front.
Science Behind it :
Here we use spherical/cylindrical glass which works as a lens. It means that it not only bends the incident light due to changing media but it also bends towards a central focal point. Here to see the image of the arrow, light has to travel from the air, through the glass, through the water, through the glass again, and finally through the air again to reach our eyes. The incident light rays are changing direction every time the medium changes. At the focal point, the image of the arrow is compressed into a single point and after the focal point, the image reverses itself, left becomes right.
I hope you like these two experiments. Feel free to comment here. If you have any questions, suggestions for me, or ideas please share them with me. Subscribe to our website and my youtube channel.
Thanks